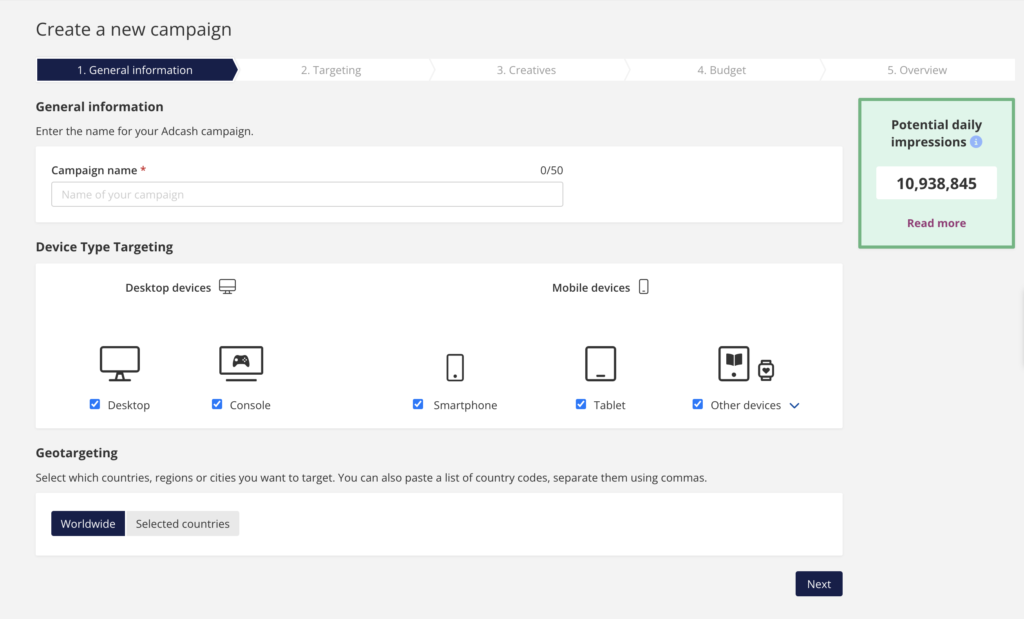
Content

Content:

  1. 1.Campaign Creation
  2. 2.Targeting
  3. 3.Creatives
  4. 4.Budget
  5. 5.Launch Your Campaign

Stay up to date with our latest news, industry trends and helpful guides!


The Ultimate Campaign Creation Guide for 2023

Receiving 10 billion ad requests per day and 350K conversions daily, we know campaigns.

Building a successful online advertising campaign with great ROAS can come in many forms depending on your goals. We’ve seen many thriving campaigns and want to share the basics to create a campaign that exceeds your expectations. So, sit back and read along as we detail the most effective way to create your campaign, including:

  • How to get started with Adcash
  • Advertiser homepage 
  • Targeting by specific criteria
  • Creatives & Ad Formats
  • Budget, Payment & Tracking
  • Successfully launch your campaign

If you haven’t started advertising with us yet and don’t know where to start, simply follow this link to the Adcash for Advertisers page and click the “Get Started” button. Select “advertiser” and which currency ($/€) for billing (make sure to choose the correct currency, as you cannot change the currency after the campaign is accepted.) and report data. Then, add your “work email” and “password” before ticking the required boxes. Hit “Register” and voilà you’ve registered and ready to create a campaign.

Now that you’ve started and are ready to be a Master of Adcash Advertising, let’s start from the beginning.

Step #1 Campaign Creation

As you can see, getting started is really simple. Why shouldn’t creating a campaign be any different? 

First things first, you must enter your email and password or “sign up” and complete the required fields before accessing the advertiser platform. 

Once you’re in, you can create a campaign by clicking the Create a campaign button to start building your campaign. If you don’t see the above image, your screen may look like this:

Tip! This is the home page for an Advertiser account. You can directly view your campaigns’ clicks, impressions, and conversions in the dashboard. Also, in the top right, where the graphic says “Online Advertising Campaign Tracking,” this is a place where you can find links to blog posts and info about upcoming affiliate marketing conferences and other industry events.

After selecting “Create a campaign”, you should see the first step out of five of creating a new campaign, General Information

Name your campaign something related to what your ad is targeting for later evaluation and assessment purposes. For generalized targeting, you can select between device types (desktop and mobile) and geographically via geotargeting.

By the way, if you prefer video explanations, we created one for you.

Device Targeting

The desktop vs. mobile ads battle continues. You can select all device types (desktop and mobile) or just one on which you want to run your ads. When targeting your campaign, we recommend targeting all kinds of devices, but not in the same campaign. The pricing and everything will be different for each device, so it’s a better decision to segment them into unique campaigns.

If you have specific device type requirements, read a little further for more detailed targeting by device type information.

Geotargeting

Where in the world do you want your ads to appear? You can opt for worldwide targeting or specific countries. The Adcash platform operates 24/7 in 195 countries, so you should easily target the country of your choice.


Step #2 Targeting

If you have particular users in mind for who you want to see ads, then the targeting section will assist you with that. You can be as broad or precise with the target selections. You can select from supplies, user interests, website categories, device type, content, and connection.

Supply

Select from supply sources listed under each ad format option. We’d like to reiterate the message in the image: keep the supply selection broad, so your campaign can receive supply based on the types of creatives. 

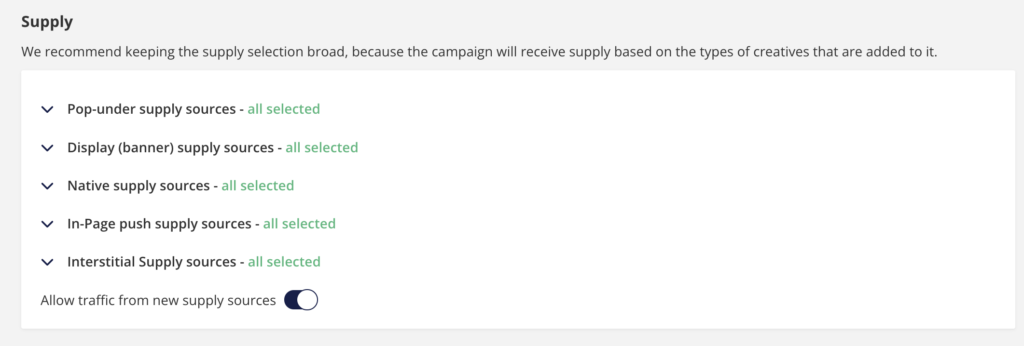
In the Supply section, you can choose from numerous source options in the industry for best campaign optimization practices. 

User Interest

When a user searches for something or acts online, that information is collected and processed among the other actions by the user to create a generalized data point. Let’s say you want to target users interested in computer hardware and gaming. This type of user most likely has an interest in “Arts & Entertainment,” “Games,” and “Computers & Electronics.” The emphasis of “interest” is to distinguish between a user online and in reality. If the user also enjoys fitness (“Health”) or gardening (“Home & Garden”) and typically engages with these verticals, you may miss out on conversions. We say this to inform you of all the scenarios when building a campaign.

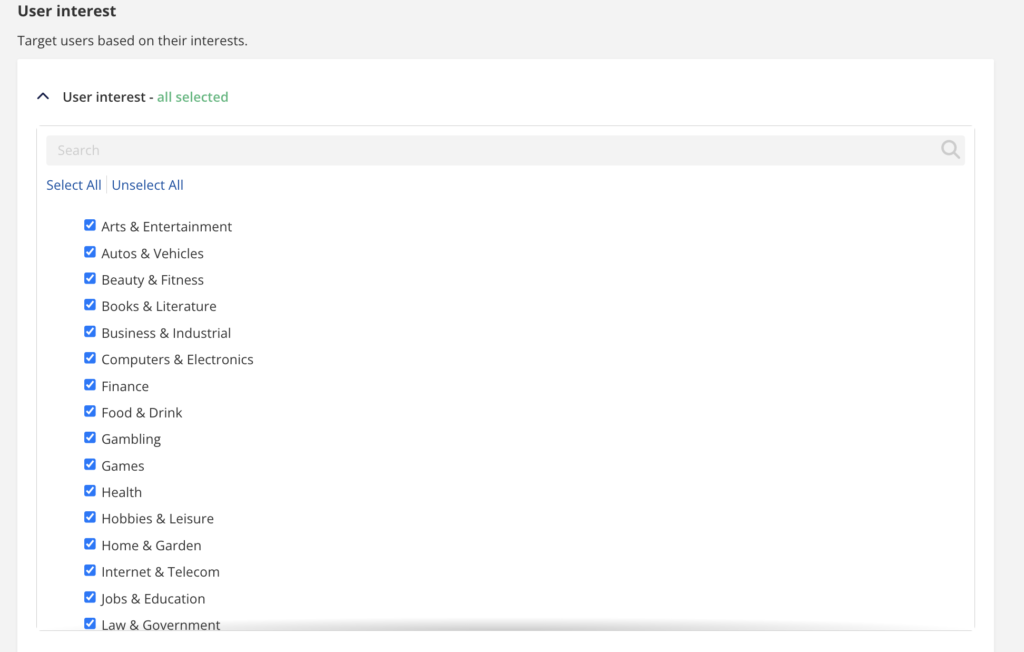
Moreover, the Website Categories being nearly full or fully selected can negatively impact your campaign if most user interests are also chosen. If this appears in your campaign, don’t worry, though it’s meant to be there. This way, it becomes an easy hurdle for you to jump by optimizing your campaign for an efficient increase in ROAS.

Website Categories

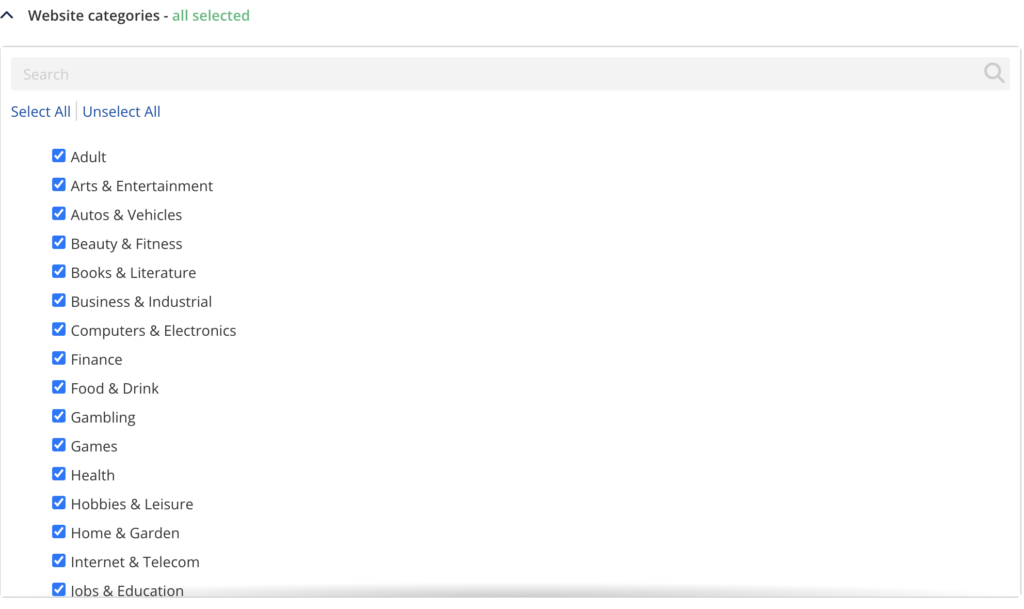
There are 27 website categories you can choose from. You can select all 27 or only 1, and it’s up to you. Although, we suggest identifying verticals that would reach your desired user. For instance, if you are advertising sports betting, you should consider selecting “Sports” and “Gambling” and any other vertical most closely related to sports betting.

Device

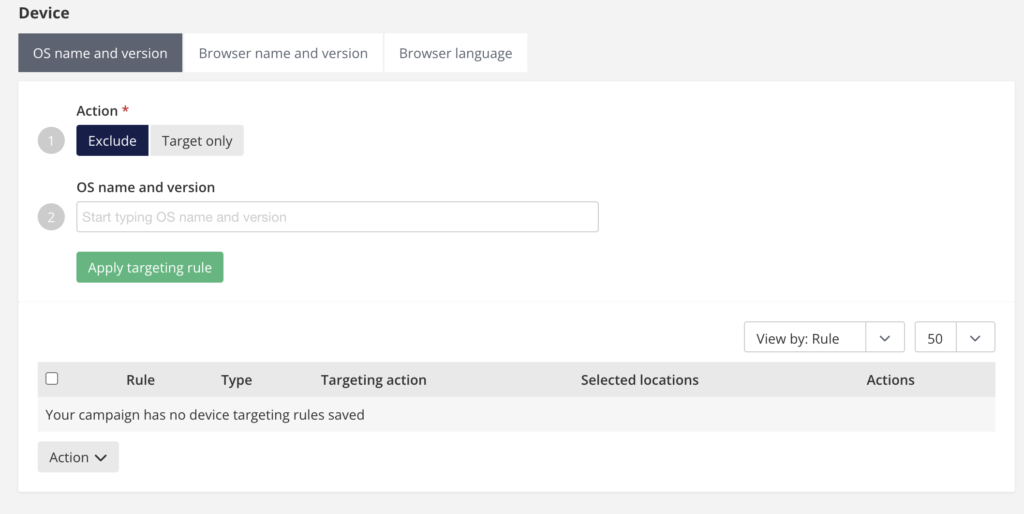
You may have noticed and wondered what the difference is between Device Targeting and Targeting by Device. Well, this section covers the precise targeting of specific device types. In the screenshot above, you can see options for operating systems (OS) and browser names, versions, and language. Here you can target specifically which OS and browsers your ads will appear to. 

Content

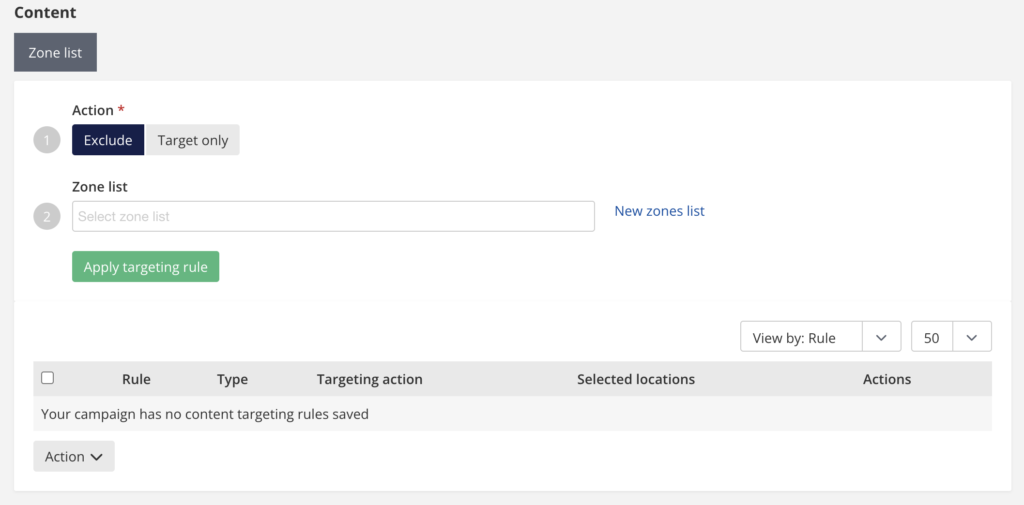
Targeting content allows for clear and concise parameters, such as Zone list.

Connection

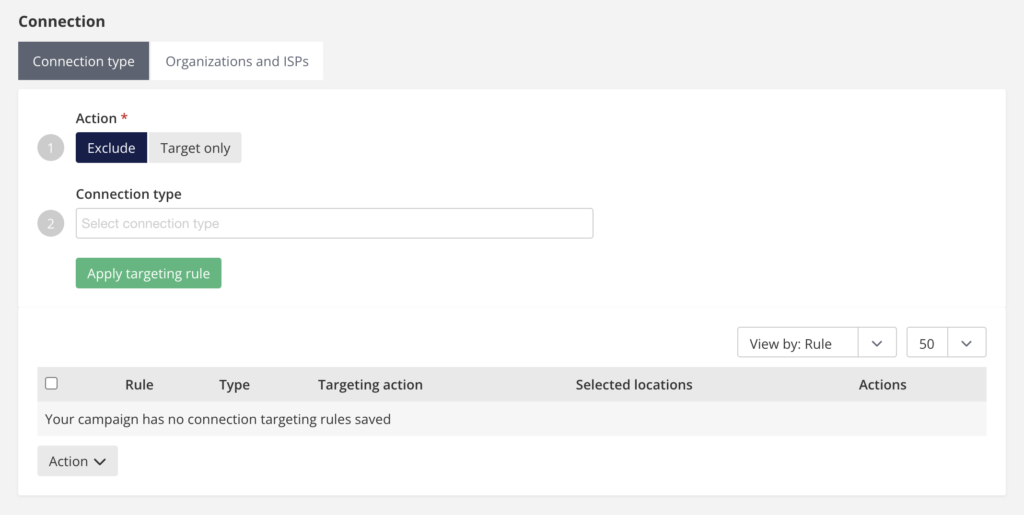
You can select from the connection type and the organizations and ISPs.


Step #3 Creatives

Fewer numbers, more creativity. As an advertiser, you can choose from five (5) creative types for your online advertising campaign. After you’ve selected which format(s) you want to use, you will add the selected locations, URL, and, if required, a creative for the ad. Underneath the “Creatives” section, you can look at the overview of each creative. 

Ad Formats

Each format has a unique trait that will optimize your campaign. We recommend starting with our surefire format Pop-Under that appears behind the browser window or, alternatively, highly visible and well-performing Interstitial ads. Our In-Page Push template recently got a facelift and is now shown in a more engaging messenger notification-like format. Native and banner ads are a classic choice for content-heavy websites, where the ads blend into the page more seamlessly and offer high engagement. Read more about our ad formats here


Step #4 Budget

Ok. We’ve got to discuss spending and budgeting for your online campaign. When setting your budget, there’s an option to customize your campaign by capping your total budget. For example, if you want to use $1000 and only that amount in your campaign, the budget setting allows you to preset the end of your campaign by choosing to cease activity when the total budget amount has been reached. 

Tip! You can customize the time of your campaign. Choose specific times or run your campaign 24/7. Most advertisers opt for 24/7.

Bids

This is where the numbers get interesting. Choosing from the bid type options, you will then be asked about frequency capping. Here, you’ll be able to limit the number of times your ad is shown to the same user or opt for the unlimited option. Before getting to the numbers, you must choose where to apply the bid.

Next, set up three (3) bids per country or one (1) bid per country. The system of quality tiers bidding has been a proven success. Nearly 60% of active CPM Advertisers have adopted/are using quality tiers bidding.

Tracking

You can track your campaign with easy-to-use tools in your Advertiser platform. Monitor your performance with information from integrations, such as Global Postback URL (S2S), Campaign HTML Pixel, and Hybrid HTML Pixel. We also have a great performance tool, aptly named conversion value. Using this tool enables our platform to pass back to us so we can display your calculated return on ad spent (ROAS). Continue reading about the conversion value setting here or for more granular information about online campaign tracking. To get even more technical information, read here.

Cappings

Wouldn’t it be nice if you could limit the number of times your ad is displayed to a user? Well, you can do that and more with the Adcash capping options. From budgets to impressions to conversions, you can cap the number of ad placements (also by country!) that appear.

Read here to edit your cappings or for more detailed information about how our capping system operates.

Budget & Limitations

You’ll need to choose whether or not you want to customize your total campaign budget. Now, you have a few more options to limit the use and perfect budgeting for your campaign(s), such as scheduling, weekly distribution, and zone capping. If 1000 impressions are set, every zone sub id will send max of 1000 impressions per day, ensuring that one zone sub id cannot dominate the exploration and eat the test budget.

Save changes.


Step #5 Launch Your Campaign!

Phew! You’ve made it to the last step. Take a break if you need to, or dive right in and go.

Overview

This last section encompasses what you have done in the previous four (4) steps. Make sure to take a minute to review the campaign information and all other fields before proceeding. If you’ve noticed a mistake with a selection, you can go back to the step you need to address without erasing all the other information you’ve already completed. After this, or if you have nothing to fix, click “Create a campaign.” 

That’s it! We’ll ask you to wait for our compliance to review your campaign. The decision will be sent to you in a timely manner. In the meantime, head to the “Add Funds” section if you haven’t filled this out. Relatively straightforward, adding funds addresses the payment method/type (MasterCard/Visa, PayPal, Bank Transfer, Bitcoin, Ethereum, USD Coin, USD Tether and the recommended automatic payment option. The video above gives a solid tutorial for adding funds.

Hooray! Your campaign has been approved. You can dust off your shoulders now as the dirty work is completed. The campaign is now running as “active.” So, let’s go back and see your campaign. You can find your campaign(s) by selecting “Campaigns” from the list on the left side panel. Congratulations, you’ve created a campaign!


Let us know in the comments section if this guide was helpful for you and if you have succeeded in your campaign. We’d love to hear from you!

Have any questions? You can contact us anytime.

-Adcash Team

Join the conversation

0 comments

Submit a comment

Your email address will not be published. Required fields are marked *